Complete Guide to create and publish your own blog in Class of 2020
Pre-requisite: None, but if you know what git is and what the heck github is, then you can skip a lot of this post.
Estimated Time : 10 - 15 minutes.
If you are too busy to follow these procedures. Message us your post. We will publish under your name(Believe me)git .
Message your post to Nischal Lal Shrestha
Message your post to Ashish or
Message your post to Sagar Devkota
But, My personal suggestion : Do it yourself
For a developer, github is more powerful than your CV or Resume, if you have idea how it function and you know the ups and down of github, certainly it will be a highlighter in your Arsenal.
Please give an attempt to do it by yourself, we will accept any foolish mistake. I am making a lot of foolish mistake here, but I am learning, So please at least give a try. There is no wrong in being stupid.
1. Install git
If you have attend FIT class of November 2016, then you certainly know what git is and probably you have already installed on your device. For our new friends Sumit, Suman, Jitendra, and other who were absent, Please download (https://git-scm.com/downloads) or you can contact me for git. I strongly recommend our new friends to understand what git is and how it functions.
Note: This is a one-time process, You only need to do once.
2. Login to Github
Most important part, login to github, If you don’t have github account, signup. Then Fork your copy of our website by clicking on fork:
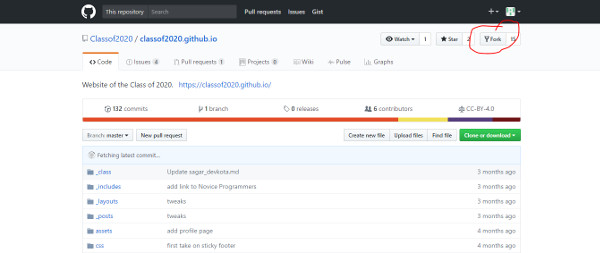
After you forked you will be in your own copy of our website, click on clone or download:
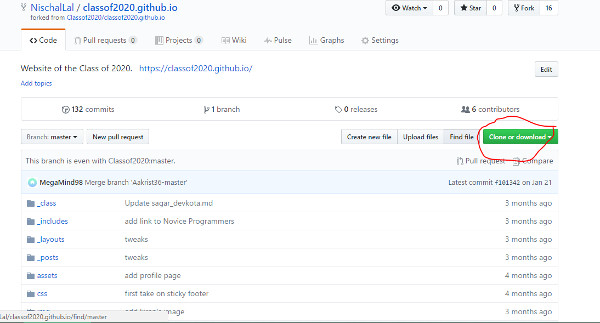
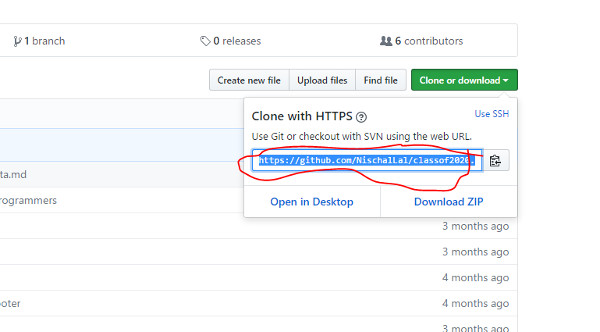
Copy the link
After you copied that link go to your desktop, then Right click, If your git was installed correctly you should see this:
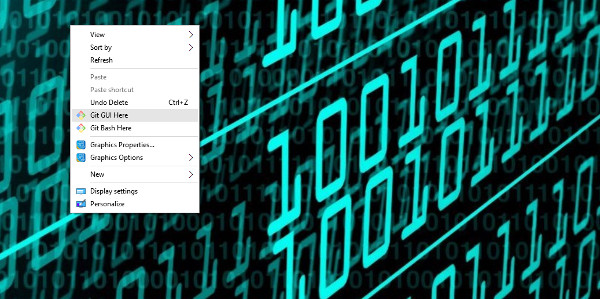
Then go to git bash here. Now you should see this:
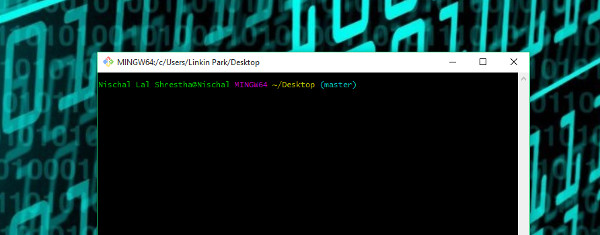
You may need to configure some Profile Settings.
Now you need to clone our website in your local computer.
For this paste the link you just copied like
git clone https://github.com/NischalLal/classof2020.github.io.git in git and press enter.
Now you should see this:
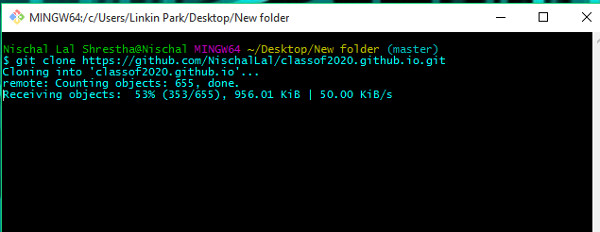
After clonning has finished. You should have a local copy of our website on your desktop, Which seem like this:

Note: This is a one-time process, You only need to do it only one time.
Now Navigate to the folder and go to _post folder:

Then in _post folder you will see all the existing blog. Go to the template follow the procedure and start creating your own blog.

The overall procedure for template.md is also availaible here
-
First make a copy of this file and rename it to date-title. Example. 2016-12-24-tree-plantation.md. Open that file and edit it (Please don’t forget to enter valid date, and don’t edit this original TEMPLATE file).
-
If you want image for your blog post, save the image in the directory img/post/ and mention the image name in header-image.
-
Fill out the above fields: title, subtitle, date, author, categories, header-image and permalink.
-
title: Title of your blog post.
-
subtitle: Subtitle of your post.
-
date: Date on which the event is going to take place.
-
author: Author of the blogpost.
-author_url: Your url(fb, personal website, youtube any you want)
-
categories: Type of event. It could be conference, campaign, anything.
-
header-image: Header image for your blog
-
permalink: permanent link for the event like /2016/08/23/testfile
-
-
Delete all of this instructional text and replace it with the actual content.
-
Finally! Save the file, git commit, and git push!
If you have any trouble in commit and push, feel free to contach us.
Tips
If you want to install image in your post then type

For real demo, see the .md file of this post.
This file uses Markdown formatting. You can use Markdown to add emphasis to your text, link to projects you’ve worked on, or link to files you’d like to share such as your resume. Here are some resources on learning Markdown:
- https://guides.github.com/features/mastering-markdown/ - a reference guide
- http://www.markdowntutorial.com/ - a more comprehensive tutorial
Special Thank: